

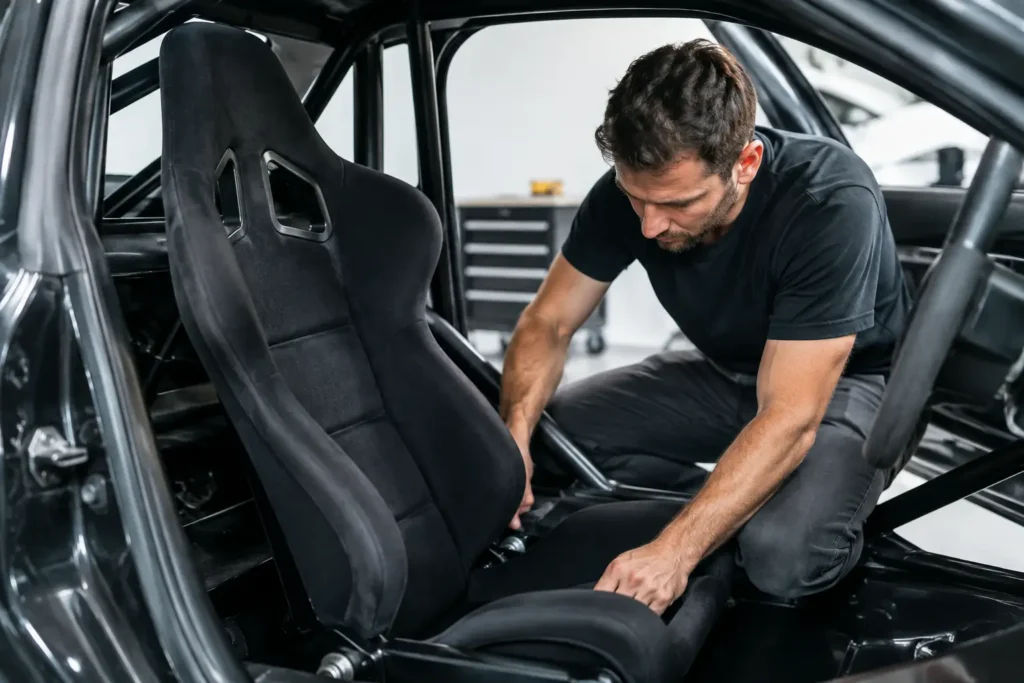
A race seat can transform the way a car feels at the limit. It holds your hips, shoulders and legs in place so you can brake consistently, steer precisely and stop bracing yourself against the door or transmission tunnel. But learning how to fit a race seat is not simply a case of bolting a bucket to the floor. Seat position, mount design, harness geometry and the strength of every fixing all matter.
A poorly fitted seat can put the driver in the wrong position, compromise restraint performance and create a serious safety risk in an impact. Treat the installation as safety-critical fabrication, whether the car is being built for track days, drifting, sprint events or full competition.
Start with the right race seat and mounting system
First decide whether a fixed-back bucket seat is genuinely required. A fixed-back FIA-style seat gives the best support for high-load driving and works properly with a multi-point harness, but it needs more cockpit space and careful mounting. Reclining sport seats are more practical in a dual-use street car, although they are not a substitute for a competition shell in a dedicated race build.
The seat must suit both the driver and the car. Check the shell width at the hips and shoulders, the available headroom with a helmet on, and clearance to the B-pillar, cage, door bar and centre console. A seat that looks right in a product photo may be too wide for a compact cockpit or may leave the steering wheel offset from the driver’s centreline.
Use mounts designed for the seat and chassis application wherever possible. Side-mounted bucket seats normally use steel or aluminium side brackets fixed to a base frame, sliders or vehicle-specific subframe. Bottom-mounted seats require the correct mounting pattern and a base that spreads load properly. Do not drill random holes in thin factory floorpan metal and assume large washers make it safe.
For a serious build, the usual arrangement is a vehicle-specific or fabricated base frame tied into strong factory mounting points, with side mounts bolted to the seat shell. This gives useful adjustment while keeping the shell rigid. Sliding rails can be suitable for a road and track car shared by more than one driver, but they add height and can introduce movement. A fixed installation is generally lower, lighter and preferable for competition.
Plan driving position before drilling anything
Place the seat in the car loosely first. Remove the old seat, clear the carpet or trim where necessary, and inspect the floor, mounting points and wiring. Modern vehicles often have seatbelt pretensioner, occupancy sensor and airbag connectors beneath the original seat. Disconnect the battery before working around restraint wiring, then follow the vehicle manufacturer’s procedure for any connectors that are removed or altered.
The lowest possible seating position is not automatically the best one. You need a clear view through the screen, safe helmet clearance to the roof and cage, and enough knee room to use all pedals without locking your legs. In a drift car, extra clearance for steering inputs can be valuable. In a circuit car, a lower, more reclined position may help centre of gravity and helmet room, provided pedal control remains correct.
Set the driver in the proposed position wearing the shoes and helmet used on track. With your back against the shell, press the clutch fully if fitted and test maximum brake pressure. Your knee should retain a meaningful bend at full pedal travel. With both hands at roughly the quarter-to-three position, your wrists should reach the top of the steering wheel without your shoulders lifting from the seat.
Check steering wheel position before finalising the seat. Many builds need a steering wheel spacer, boss adjustment or an aftermarket column solution to bring the wheel closer to the driver. Moving the seat forward to compensate for a wheel that is too far away can leave your legs cramped and compromise pedal feel.
Centre the driver, not just the seat
Use the steering wheel and pedal box as your reference points. Some tunnels, seat bases and factory mount locations are not symmetrical, particularly in right-hand-drive cars. The seat may need a small lateral offset so the driver sits square to the wheel. Confirm that your helmet does not contact the cage, roof or door when you move under load.
Build a strong mounting foundation
Once the position is confirmed, identify the load path. The seat, brackets, base frame and floor mounts must act as one system. In a collision, the installation needs to resist not only the driver’s weight but the enormous forward and upward loads generated through the harness and seat shell.
Use high-quality, correctly sized fasteners specified by the seat and mount manufacturer. Motorsport-grade bolts, appropriate washers and locking hardware are essential. Never substitute unknown bolts from a mixed hardware box, and do not rely on self-tapping screws, rivnuts in unsupported thin sheet, or a single layer of corroded floorpan.
Where a new mounting point is unavoidable, reinforce the floor correctly with substantial spreader plates or, preferably, a properly fabricated structure tied into strong chassis sections. The exact solution depends on the chassis, event regulations and intended use. This is a job for an experienced fabricator if there is any doubt. Welding to a road car without considering fuel lines, wiring, corrosion protection and local regulations creates more problems than it solves.
Torque every fastener to the manufacturer’s specification. If no specification is provided, use the bolt manufacturer’s data for the exact diameter, grade and lubrication condition rather than guessing. Mark tightened bolts with paint pen so inspection is quick before events.
Fit the seat without stressing the shell
Bolt the side mounts to the seat using the approved mounting holes only. Competition shells are engineered around specific hole locations; drilling additional holes can weaken the structure and may invalidate homologation. Use the washers and spacers supplied or specified by the manufacturer, and ensure brackets sit flat against the shell.
Leave all fasteners lightly tightened while you set height, rake and fore-aft position. Check that the seat does not foul the floor, rails, tunnel or cage as it is adjusted. Once the final position is set, tighten the seat-to-bracket fasteners and then the bracket-to-base fasteners in a controlled sequence.
Seat rake is a balance. Too upright can concentrate pressure on the lower back and make helmet clearance difficult. Too reclined can reduce pedal leverage and make harness routing less effective. The correct angle depends on the seat design, driver height and car layout, but the driver should be supported evenly from pelvis to shoulders without sliding forward in the shell.
If using a composite seat, inspect it carefully before fitting. Do not use a shell with impact damage, deep cracks, delamination or heavily worn mounting areas. Fibreglass and carbon shells do not always show damage as clearly as steel parts, so when in doubt, replace the seat or have it assessed by a qualified specialist.
Set harness and belt geometry after the seat is fixed
A race seat and harness work as a system. Fitting a bucket seat while retaining a standard three-point belt can be acceptable for some road-focused setups if the seat is designed for it, but do not route a standard belt through harness holes unless the manufacturer specifically permits it. Equally, fitting a multi-point harness without suitable anchorage points, a compatible seat and appropriate rollover protection is unsafe.
Shoulder straps should leave the seat at the correct angle and run back to an approved harness bar, roll cage crossbar or approved chassis anchorage. They must not run sharply down to the rear floor, where they can apply dangerous downward force to the driver’s spine in a frontal impact. Follow the harness manufacturer’s angle limits exactly.
Lap belts must sit low across the pelvis, not over the stomach. The anti-submarine straps on a six-point harness need correct routing through the seat and suitable anchorage beneath the driver. Do not attach harnesses to seat mounting bolts unless the seat, mount and regulations explicitly allow that arrangement.
If the car is used in sanctioned competition, check the current regulations for your championship before buying or fitting anything. Requirements for seat homologation dates, head restraints, cage design, harness expiry and mounting hardware vary between organisers. A setup accepted at an untimed track day may not pass scrutineering at a race meeting.
Carry out final cockpit checks
Before refitting trim, sit in the car again and run through every control. Operate the pedals with race footwear, select every gear, pull the handbrake, reach the extinguisher pull cable and check access to electrical cut-offs where fitted. Make sure the door closes cleanly and that the driver can exit quickly with belts released.
Then inspect under the car and beneath the seat. Confirm no fastener contacts fuel lines, brake pipes, wiring looms or exhaust heat shielding. Secure loose wiring, especially airbag connectors that are no longer used, and protect any area where brackets pass close to sharp metal edges.
After the first track session, recheck every mounting bolt and inspect the seat base for movement. A seat should feel completely solid. Any clicking, rocking or change in driving position means stop and investigate before the next session. The best race seat installation disappears once you are driving – it simply keeps you locked in place, properly restrained and ready to focus on the lap.