

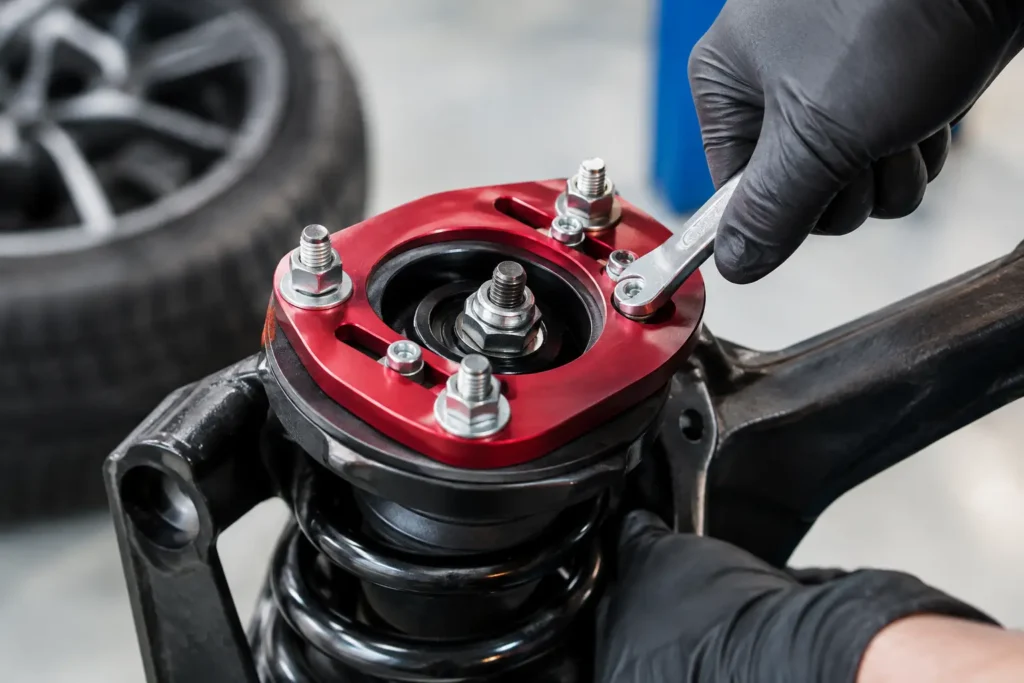
A car can have quality coilovers, fresh tyres and serious brake hardware, yet still feel vague on turn-in or chew through an outer tyre shoulder. Often, the missing adjustment is at the top of the strut. Knowing how to adjust camber plates gives you a practical way to tune front-end grip, steering response and tyre contact patch – but only when the alignment is measured properly afterwards.
Camber plates are not a fit-and-forget styling upgrade. They are an alignment tool. Used correctly, they give a lowered street car, drift build or track machine the adjustment range that factory top mounts rarely provide. Used carelessly, they can reduce braking stability, create uneven tyre wear and leave the car worse than before.
What camber plates actually adjust
A camber plate replaces or modifies the upper strut mount, allowing the top of the suspension strut to move inboard or outboard. Moving the top of the wheel inward adds negative camber. Moving it outward reduces negative camber, moving towards positive camber.
Negative camber means the top of the wheel leans towards the centreline of the vehicle. In a corner, body roll tends to push the loaded outside tyre onto its outer shoulder. A sensible amount of static negative camber helps that tyre stand more upright under load, maintaining a larger and more consistent contact patch.
That is why track and drift cars commonly run more negative camber than a standard road car. The trade-off is clear: excessive negative camber reduces the straight-line contact patch and can wear the inner edge of the tyre quickly. The right setting depends on tyre construction, ride height, spring rate, driving style, steering geometry and the surfaces the car sees.
Before adjusting camber plates
Do not start by sliding the plates to their most aggressive position. First check that the suspension is fitted correctly and that there is no play in the top mounts, ball joints, track rod ends, wheel bearings or bushes. Camber adjustment cannot compensate for worn components or poor suspension geometry.
The car should sit at its real running height, with the wheels and tyres you intend to use. If you make a major ride-height change after setting camber, expect the camber and toe to change with it. Coilover preload, spring length and corner weights can all influence where the car settles.
You will need a safe, level working area and, ideally, access to proper alignment equipment. A string alignment setup and a quality digital camber gauge can get a competent home builder close, but a calibrated four-wheel alignment rig is the right finishing point for a fast road or competition car.
Have these essentials ready:
- The correct socket, spanner and Allen or Torx tools for the plate hardware
- A torque wrench covering the manufacturer’s specified torque range
- A camber gauge or alignment equipment capable of measuring the setting accurately
- Wheel chocks, axle stands and a trolley jack rated for the vehicle
- Paint marker or masking tape for recording the starting position
Check the camber plate manufacturer’s fitting instructions before touching the bolts. Some plates use slotted mounting holes, while others use a sliding centre section with separate locking hardware. Torque figures, adjustment direction and access can vary significantly between applications.
How to adjust camber plates step by step
1. Record the current setup
Measure and write down the current camber on both front wheels. Also note toe, ride height, tyre pressures and the plate position. A paint mark around the current setting is useful insurance if you need to return to baseline.
Look at the tyre wear pattern too. Outer-edge wear suggests the tyre is rolling over in corners or being used with insufficient negative camber for the application. Inner-edge wear may indicate excessive negative camber, too much toe-out, worn suspension parts or a combination of all three.
2. Load the suspension correctly
The most accurate adjustment is made with the vehicle resting on its wheels on alignment turn plates or slip plates. This allows the suspension to settle naturally as you make changes.
If access requires the car to be raised, support it securely and lower it back onto the wheels before taking final measurements. Never loosen top-mount hardware while relying only on a jack. Once lowered, roll the car forwards and backwards a short distance or bounce the suspension gently to remove tyre scrub and suspension bind.
3. Loosen only the adjustment hardware
Open the bonnet and identify the bolts or nuts that lock the camber plate in place. In many MacPherson strut applications, these are the fasteners around the top mount. Do not remove the central strut shaft nut unless the manufacturer specifically instructs you to do so. That nut retains the damper assembly and is not normally part of the camber adjustment process.
Loosen the plate hardware just enough for controlled movement. Keep the strut supported by the suspension rather than allowing it to hang at full droop, which can make the plate difficult to position accurately.
4. Move the plate in small increments
For more negative camber, move the top of the strut towards the engine bay centreline. For less negative camber, move it towards the wing. On some vehicles, the direction can appear counterintuitive because of plate design or strut orientation, so watch the gauge rather than relying on assumptions.
Make small, equal changes side to side as a starting point. A few millimetres at the plate can make a meaningful change at the wheel. Do not chase an exact number by eye. Adjust, settle the suspension and measure again.
On a road and occasional-track car, moderate negative camber often delivers the best compromise. A dedicated circuit car may need considerably more, particularly with stiff springs, high-grip tyres and sustained cornering loads. Drift setups can differ again: some drivers use substantial front negative camber for steering response, but too much can reduce braking and straight-line tyre performance.
5. Torque, settle and re-measure
Once the desired position is reached, tighten all locking hardware to the camber plate manufacturer’s specification. Torque settings matter here. Under-tightened hardware can slip during hard braking, kerb strikes or repeated drift transitions. Over-tightening can damage threads, distort components or cause bearing bind in some designs.
Settle the vehicle again, then recheck both sides. Camber should be close side to side for most street and track applications, unless you are deliberately setting a competition car up for a circuit with a consistent direction of turn. Even then, asymmetric settings should be based on measured results, not internet folklore.
Camber changes toe – always check it
This is the part that gets missed most often. Moving the top of a MacPherson strut changes more than camber. It usually changes toe as well. A car that was stable before the camber adjustment can become nervous, tramline on poor roads or destroy tyres if the toe is left unchecked.
For a road car, keeping front toe close to the manufacturer’s intended range is generally the sensible choice. A small amount of toe-out can sharpen initial turn-in on track, but it can also make the car less settled at motorway speed and increase tyre wear. Drift and race setups may call for different settings, but they still need to be intentional and measured.
If you only have time or equipment for one professional check after fitting camber plates, make it a full alignment. Ask for a printout showing camber, caster and toe before and after adjustment. It gives you a reliable baseline for future changes.
Check clearance and damper operation
More negative camber pulls the top of the tyre inward, but it can move the lower tyre and wheel closer to the strut, spring perch, brake hose or inner arch liner depending on suspension design. Turn the steering from lock to lock and inspect clearance with the car at ride height.
Check clearance under compression too, especially on lowered cars with wider wheels, aggressive offsets or large tyres. A setup that clears on the driveway may contact the arch liner or spring under hard braking and full bump. If possible, inspect after a test drive and look for witness marks on the tyre, wheel, strut body and surrounding components.
Also listen for spring pinging, top-mount noise or binding as the steering turns. Camber plates with spherical bearings can transmit more road noise than rubber factory mounts. That is normal to a point, but clunks, notchiness or obvious movement need investigation before the car is driven hard.
Use tyre temperatures and wear to refine the setting
The alignment rack gives you a number. The tyres tell you whether that number works. After a hard road session, track day or drift event, inspect the tread across its width. Consistent wear and temperatures usually indicate the tyre is working evenly; pronounced shoulder overheating points to a setup that needs attention.
Do not alter camber in isolation every time. If the car understeers, the cause could be front camber, but it could also be tyre pressure, front-to-rear grip balance, damping, anti-roll bar stiffness, toe or driver technique. Change one variable at a time and record the result. That is how a performance setup becomes repeatable rather than random.
Camber plates give you adjustment range; they do not replace alignment discipline. Start with a measured baseline, make controlled changes, torque the hardware properly and verify toe every time. The best setting is not the lowest-looking wheel angle in the paddock – it is the one that keeps the tyre working hard through the whole corner and brings the car back to the pits in control.