

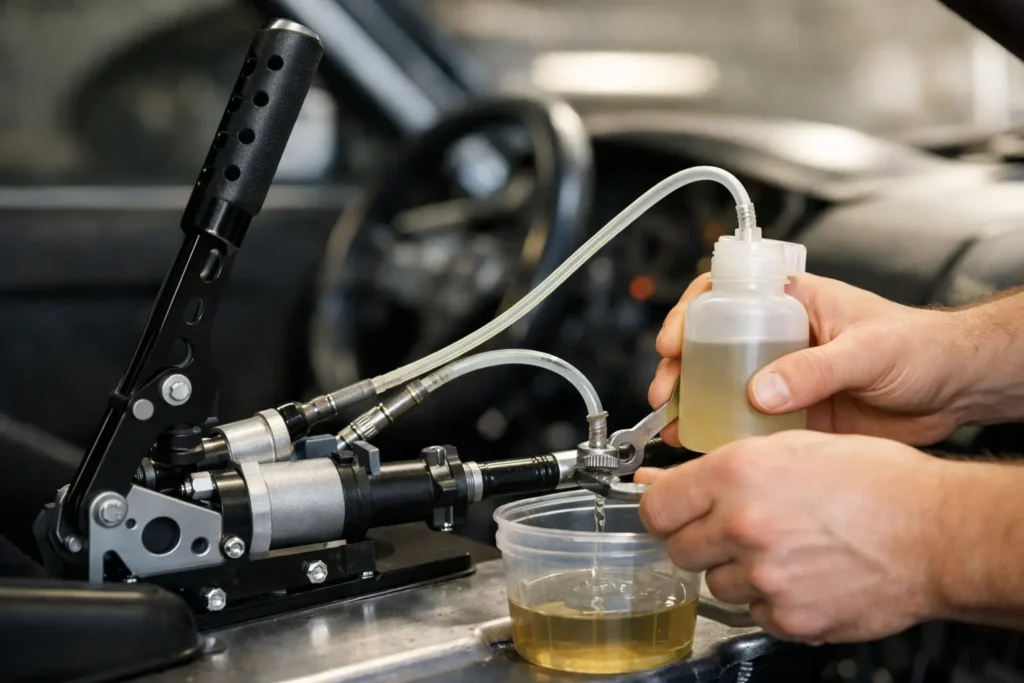
A hydraulic handbrake that pulls to the top of its travel, feels springy or only locks one rear wheel is not a cable-adjustment problem. It is usually air in the circuit, an incorrect line layout, or a component issue. Knowing how to bleed hydraulic handbrake systems properly is essential before a drift day, race meeting or any serious shakedown – because predictable rear brake response starts with a solid hydraulic pedal.
Hydraulic handbrakes are common on drift, rally and track builds, but the plumbing differs from car to car. Some use a dedicated rear calliper circuit, while others are installed inline with the original rear brake circuit. That difference changes the order of work and the risks involved, so confirm your system layout before opening a bleed nipple.
Check the System Before You Bleed
Do not start pumping the lever until the installation has been inspected. A bleed will not cure a loose fitting, a damaged flare, a master cylinder with the wrong bore size, or a calliper mounted with its bleed nipple below the fluid inlet. Air naturally rises, so the nipple must sit at the highest point of the calliper for a conventional bleed to work.
Check that every hose is rated for brake fluid and pressure, that all fittings are correctly seated, and that hard lines are supported away from heat, sharp edges and moving suspension parts. On a drift car, pay particular attention to the route around the rear subframe and differential. A line that looks fine on axle stands can still stretch or rub when the suspension is loaded.
Also identify whether the handbrake is a separate circuit or an inline setup:
- Separate circuit: the hydraulic handbrake master cylinder feeds dedicated rear callipers. This is generally the simplest arrangement to bleed and gives the most consistent motorsport-focused operation.
- Inline circuit: fluid passes through the handbrake master cylinder as part of the factory rear brake system. Bleeding must account for both the foot brake master cylinder and the handbrake cylinder.
An inline hydraulic handbrake should not be treated as a shortcut around a properly functioning service brake system. For road use in Great Britain, a modified hydraulic handbrake may not satisfy parking-brake or MOT requirements. Build and use the system for its intended application, and keep any road car compliant.
Tools and Fluid You Need
Use fresh brake fluid from a sealed container. Most performance brake systems run DOT 4 or DOT 5.1 glycol-based fluid, but use the grade specified for the master cylinders, callipers and vehicle. DOT 5 silicone fluid is not interchangeable with normal DOT 3, DOT 4 or DOT 5.1 fluid.
You will need a correctly sized ring spanner for the bleed nipples, clear bleed hose, a catch bottle, brake cleaner, clean rags, gloves and eye protection. A pressure bleeder makes the job faster and reduces the chance of introducing air, although a two-person pedal-and-lever method works well when done carefully. Keep plenty of fluid ready. Letting the reservoir run low means starting again.
Brake fluid strips paint and damages some finishes. Cover painted panels, wipe spills immediately and dispose of used fluid responsibly.
Bench Bleed the Handbrake Master Cylinder First
If the hydraulic handbrake is newly installed, bench bleeding the master cylinder saves a lot of time. Air trapped inside the cylinder can be difficult to shift once it is mounted upright in the car, especially with a short lever stroke.
Secure the master cylinder level in a vice using soft jaws. Fit suitable bleed fittings and route short hoses from the outlet back into the reservoir, ensuring the hose ends remain below the fluid level. Fill the reservoir, then move the piston slowly through its stroke. Continue until there are no bubbles returning through the fluid.
Do not snap the lever or piston rapidly. Fast movement can churn the fluid and create small bubbles that look like a continuing fault. Once the cylinder is bled, cap the outlet or connect the line immediately to minimise fluid loss and air entry.
If the master cylinder is already installed, you can often crack the outlet fitting slightly while an assistant applies gentle lever pressure, then tighten it before the lever is released. Protect the surrounding area with rags. This is effectively bleeding the highest point of the handbrake circuit and can remove a stubborn air pocket quickly.
How to Bleed a Hydraulic Handbrake Step by Step
Raise the vehicle safely, support it on axle stands and remove the rear wheels if access is restricted. Never rely on a trolley jack alone. Set the handbrake lever fully down, fill the relevant reservoir to the maximum mark and keep checking it throughout the process.
Start with the calliper furthest from the master cylinder, then move to the nearer side. On a dedicated handbrake circuit, this is usually the rear calliper with the longest line run. If your plumbing is unusual, follow the actual route of the line rather than assuming left or right side order.
Push a clear hose tightly over the first nipple and place the other end in a catch bottle with a small amount of clean brake fluid in the bottom. This helps prevent air being drawn back through the hose threads.
With a helper in the driver’s seat, ask them to pull the hydraulic handbrake lever smoothly and hold it under firm pressure. Open the bleed nipple around a quarter turn. Fluid and air will travel down the hose, and the lever will move towards the end of its travel. Close the nipple before instructing them to release the lever.
Repeat this sequence: pull and hold, open, close, release. Watch the fluid through the clear hose. Early passes may show large bubbles, then fine bubbles, then a clean uninterrupted flow. Keep the reservoir topped up after every few cycles. Do not allow it to uncover the feed port.
When the first side runs clean, tighten the nipple to the manufacturer’s specified torque and move to the second calliper. Once both sides are done, pull the lever several times. It should become firm early in its travel and remain firm when held. A slow sinking lever usually indicates air, a fluid leak or internal master-cylinder bypass.
For an Inline Hydraulic Handbrake
An inline system needs more care because it shares the rear service brake circuit. Begin by bleeding the handbrake master cylinder outlet, then bleed the rear callipers using the normal brake pedal. Depending on the line routing, it can help to perform a final bleed at each rear calliper using the hydraulic handbrake lever as well.
The aim is to remove air from both masters and every section of pipe between them. If the foot pedal becomes long after fitting an inline handbrake, do not assume the handbrake lever bleed alone has fixed it. Re-bleed the entire brake system in the manufacturer’s recommended sequence and inspect every union.
A pressure bleeder is particularly useful here. Apply only the pressure specified by its manufacturer and the vehicle reservoir cap arrangement. Excessive pressure can force fluid past seals, damage a weak reservoir or create a messy leak where you least want one.
Fix a Lever That Still Feels Soft
If no visible bubbles remain but the lever is still soft, start with the basics. Check the reservoir level, all flare nuts, banjo bolts and bleed nipples for weeping fluid. Even a tiny leak can admit air as the lever returns. Inspect flexible hoses for ballooning under pressure and ensure the handbrake master cylinder pushrod has sensible free play rather than preloading the piston.
Calliper position is another common issue. A rear calliper temporarily removed for custom mounting may need to be rotated so its nipple is genuinely at the top during bleeding. Keep the pads or a suitable spacer in place and never allow the pistons to overextend. On twin-calliper installations, bleed each dedicated calliper independently.
Bore size matters too. An oversized handbrake master cylinder moves more fluid but requires more lever force; a smaller bore increases leverage but can need more travel. Bleeding cannot compensate for a master cylinder that is poorly matched to the calliper piston area. Choose components as a system, particularly on high-grip tyre and competition builds.
Finish With a Static Inspection
Clean every connection, refit the wheels and torque wheel bolts or nuts to specification. With the vehicle still stationary, hold the handbrake lever firmly for 20 to 30 seconds and inspect all joints for fresh fluid. Then check the foot brake pedal separately. The two controls must feel consistent, with no warning lights, leaks or unexpected loss of pedal travel.
Test the car only in a controlled private environment at low speed. A correctly bled hydraulic handbrake should apply the rear brakes cleanly and repeatably, not require a desperate full-height pull. If it does not, stop chasing the symptom at the lever – inspect the hydraulic layout, component sizing and calliper setup before the next hard run.