

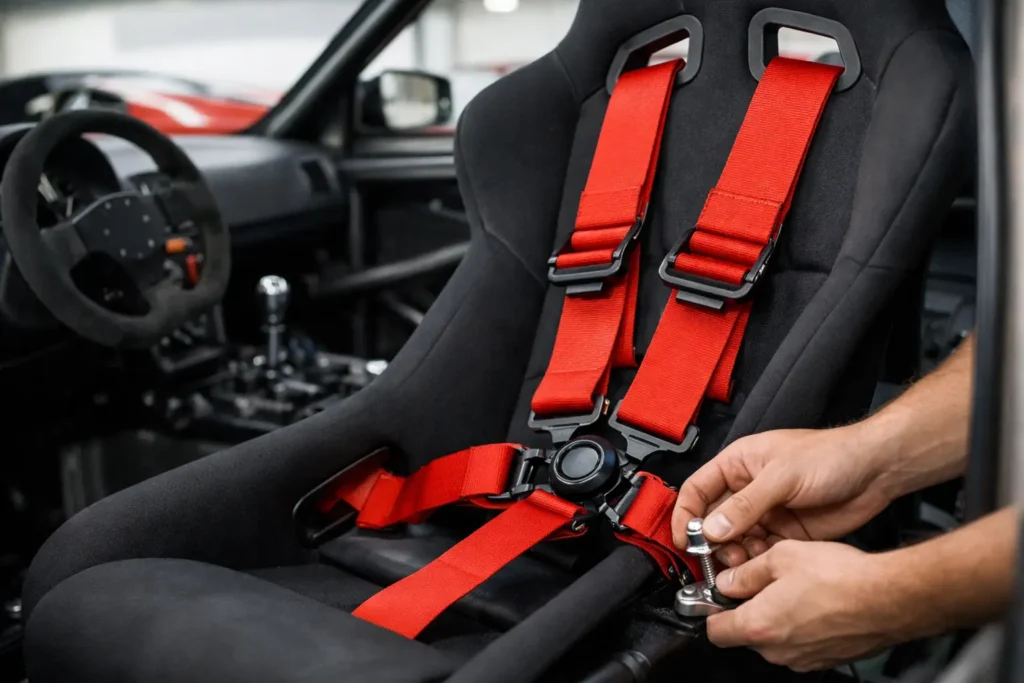
A race harness is only as effective as the structure anchoring it. Fit a premium six-point harness to weak mounting points, route the shoulder belts over the wrong angle, or leave excess webbing twisted, and the restraint system cannot manage crash loads as intended. This race harness installation guide focuses on the details that matter in a track, drift or competition cockpit.
Before buying brackets or drilling a floorpan, read the harness manufacturer’s current fitting instructions and the regulations for the series you intend to enter. FIA approval, road legality, seat design, roll-cage layout and the car’s original restraint system all affect what is acceptable. If there is any uncertainty around mounting structure or welding, use an experienced motorsport fabricator.
Start with the harness, seat and structure
A harness installation is a system, not a collection of belts and eye bolts. The seat must hold the driver in the correct position, the harness must suit the seat’s pass-through openings, and the chassis or roll cage must provide load-bearing anchor points. Choosing components separately often creates avoidable fitment problems.
For serious circuit or drift use, a fixed-back FIA seat, correct side mounts and a properly designed roll cage or harness bar provide the most controlled foundation. A reclining road seat may be suitable for limited applications only if its construction, harness apertures and vehicle regulations permit it. Do not cut new slots into a seat shell unless its manufacturer explicitly approves the modification.
Four-point, five-point and six-point harnesses have different applications. A four-point arrangement can be appropriate where permitted, but it must be specifically designed to prevent submarining. Five- and six-point systems add anti-submarine straps that control upward movement of the lap belt in a frontal impact. For most dedicated track and race builds, a six-point harness is the preferred layout when matched to a compatible seat.
The driver also matters. Harnesses are not one-size-fits-all safety equipment. Check belt adjuster reach, shoulder-width fit, buckle position and the practical ability to tighten the belts while seated. A harness that cannot be pulled tight every session is not properly installed in use.
Race harness installation guide: choose anchor points first
The strongest and cleanest installation uses purpose-built, correctly located mounts. Original seatbelt mounting points may sometimes be used, particularly for lap belts, but only where the vehicle structure, thread size, hardware and harness manufacturer all approve the arrangement. Never assume an existing threaded hole is automatically suitable for a race belt.
Shoulder straps should normally run rearward from the seat at a near-horizontal angle, with the permitted downward angle defined by the harness manufacturer. Excessive downward routing increases spinal compression risk in a frontal impact. This is why a harness bar or rear cage crossbar placed at the right height is preferable to an improvised mounting point low in the boot area.
Do not wrap shoulder belts around a rear strut brace, thin tubing, seat frame, parcel shelf structure or any component not engineered as a harness anchor. A roll-cage crossbar used for wrap-around straps must be the correct diameter, wall thickness and position for the harness specification. It must also be welded or otherwise integrated into the cage structure by a competent fabricator.
Lap belts should pull down and rearward from the driver’s hips, not across the stomach. Their anchor points need to sit close enough to the seat that the belt loads the pelvic bones rather than soft tissue. Keep the belt path clear of sharp seat-mount edges, exposed threads and adjustment mechanisms.
Anti-submarine straps require equal care. On a six-point harness, the two straps commonly pass through dedicated seat openings and mount to reinforced floor locations specified by the harness and seat manufacturers. They should not be mounted to a flimsy seat runner or routed around the front edge of the seat cushion. Their job is to maintain lap-belt position under load, so geometry is critical.
Bolt-in, clip-in and wrap-around fittings
Most motorsport harnesses use one of three termination methods. Bolt-in end fittings attach directly to approved threaded points. Clip-in fittings connect to correctly installed eye bolts, allowing faster removal or interchange. Wrap-around shoulder straps loop around a suitable cage crossbar.
Each method has advantages. Bolt-in fittings are compact and simple where correctly positioned factory or reinforced mounts exist. Clip-in ends make it easier to remove belts for access or cleaning, but the eye bolts must be installed in the correct direction and secured according to the manufacturer’s torque guidance. Wrap-around straps work well on a cage crossbar, yet require careful folding and threading through the adjuster exactly as instructed.
Never mix hardware because it appears to fit. Use the supplied fittings or approved equivalents with the correct thread pitch, backing plates and load-spreading washers. If a new anchor point is required in the floor, a proper reinforcement plate is essential. A bolt through bare sheet metal is not a motorsport mounting solution.
Fit the seat before setting belt length
Position the seat and steering wheel before finalising harness adjustment. The driver should be able to operate the pedals with a slight bend in the knee, reach the wheel without locking their elbows and fully depress the clutch or brake pedal without sliding forward. If the seat moves after the belts are set, the harness geometry moves with it.
Once the seating position is fixed, pass each belt through the intended seat aperture without forcing the webbing against the shell. Shoulder belts should lie flat across the shoulders and should not converge sharply behind the seat unless the harness instructions allow it. Avoid crossed shoulder straps unless the specific harness and competition rules permit that configuration.
Set the lap belts low across the pelvis, then tighten the shoulder straps. The buckle should sit centrally and remain accessible. On a six-point setup, route the crotch straps through the correct seat openings and adjust them so they support the lap belt position without creating uncomfortable upward pull during normal seated posture.
Keep webbing flat throughout. A twist in a belt reduces its ability to spread load and can cause discomfort that encourages the driver to loosen it. Check that straps cannot rub against sharp metal, cage gussets or the seat shell as the driver moves or the car vibrates.
Hardware, torque and protection details
Motorsport hardware is specified as a system. Use the harness maker’s recommended bolts, eye bolts, washers and reinforcement plates, then tighten them to the stated torque value. Over-tightening can damage threads or fittings; under-tightening allows movement. Mark completed fasteners with a paint pen after torqueing so inspection is quick before an event.
Where belts pass near an edge, fit suitable abrasion protection or correct the route. Tape is not a substitute for a properly positioned mount. Likewise, do not let harness webbing run beneath a seat runner, where adjustment can crush or cut it.
If your car retains airbags and original three-point belts, do not remove or disable equipment without understanding the road-use, insurance and MOT implications. A competition harness is not automatically safer for everyday driving, especially without a compatible seat, head restraint and rollover protection. Many track cars retain original belts for road journeys and use race harnesses only where the complete installation supports their intended use.
Final checks before the first session
With the driver wearing the helmet and normal race clothing, carry out a full static check. The helmet can change shoulder-belt contact and head clearance to the cage. Confirm that the driver can operate every control, reach the fire extinguisher pull if fitted, and release the harness quickly with either hand.
Check the installation at least as carefully as you check brake fluid or wheel torque. Inspect all webbing for fraying, fading, contamination and cuts. Look for loose bolts, distorted eye bolts, cracked mounting plates and rub marks around seat apertures. Harnesses have service-life limits under FIA rules and manufacturer guidance, so expiry labels matter even when the belts look clean.
For a build that needs dependable safety hardware alongside the rest of the cockpit, ProSpeed Parts supplies motorsport-focused components for track, drift and race applications. The right harness is a worthwhile purchase, but correct mounting, belt geometry and routine inspection are what turn it into a restraint system you can trust when the car is moving at full pace.