Braided hose can make a fuel system look properly finished, but looks mean nothing if the routing is wrong. One line laid too close to a manifold, one unsupported section rubbing a bulkhead, or one tight bend pulling on a fitting is all it takes to turn a solid build into a fire risk. If you want to know how to route braided fuel lines safely, start with this rule: route for heat control, movement, and service access first, then worry about appearance.
How to route braided fuel lines safely from the start
The biggest mistake on custom fuel systems is treating hose routing like an afterthought. Builders spend time choosing the right hose size, fittings and pump setup, then run the line through whatever gap looks easiest. That approach might work for a week, but on a street car, drift car or race build, vibration, engine movement and heat cycles will expose every weak decision.
A safe route starts with the fuel system layout as a whole. Think about where the tank or cell sits, where the pump and filter are mounted, where the regulator lives, and how the feed and return will travel through the chassis. The cleanest route is usually the one with the fewest sharp changes in direction, the least exposure to heat, and enough access for inspection later. If you cannot see or reach a section of hose once the car is assembled, you are relying on luck.
Braided hose also changes the equation slightly. It offers abrasion resistance and strength, but it is not invincible. Stainless braid can wear through nearby components just as easily as those components can damage the hose. That means routing is not only about protecting the line from the car. It is also about protecting the car from the line.
Keep braided fuel lines away from heat
Heat is the first enemy. Fuel near exhaust components absorbs temperature fast, and modern engine bays leave little room for mistakes. You want maximum distance from exhaust manifolds, turbo housings, downpipes, screamer pipes and exhaust tunnels. If there is a cooler path along the chassis rail, inner wing or transmission tunnel with proper shielding, use it.
There is no single magic clearance figure that suits every build because exhaust temperature, airflow and shielding vary. A naturally aspirated road car gives you more tolerance than a turbo drift car sitting on limiter. The closer the line gets to a heat source, the more you need hard barriers, not just hope. Heat sleeve can help, but it should not be used as an excuse for poor routing. If you can reroute the hose 100 mm away from a manifold instead of wrapping it and calling it done, reroute it.
Under the car, be equally strict. Running fuel hose near the exhaust centre section may seem convenient, especially on converted or engine-swapped cars, but radiant heat builds over time. Use the opposite side of the tunnel where possible, and if the chassis layout forces a closer path, add proper shielding fixed to the vehicle rather than loose wrap tied to the hose.
Engine movement matters more than static clearance
A line that clears the turbo by 20 mm on the ramp may not clear it under load. Engines twist on their mounts. Gear changes, clutch kicks and kerb strikes all move components relative to one another. Leave room for movement at the engine, especially near rails, regulators and flex sections. Safe routing is measured with the car running in the real world, not only with the bonnet open in the workshop.
Prevent chafing and unwanted contact
Abrasion is the second enemy, and it catches out plenty of experienced builders. Braided hose dragged across a sharp bracket edge or clamped badly against a chassis seam will eventually fail. Even where the braid itself survives, the liner underneath can be compromised over time.
Use P-clips or proper insulated line clamps at regular intervals so the hose cannot swing, sag or vibrate against surrounding parts. Cable ties are fine for temporary mock-up, but they are not a long-term answer on a serious fuel system. Secure the hose often enough that it follows the route you intended, not the route vibration chooses later.
Where the line passes through a panel, bulkhead or boot floor, never feed it through bare metal. Use a proper bulkhead fitting, grommet, or sealed pass-through designed for fluid lines. This is one of the simplest parts of learning how to route braided fuel lines safely, yet it is still ignored on too many builds. A nice hose and premium fittings mean nothing if the line is sawing itself against a raw edge.
You also need to watch what the braided outer layer can damage. If a hose sits against painted panels, loom covering, coolant hoses or brake lines, the braid can wear those surfaces down surprisingly quickly. Separation matters both ways.
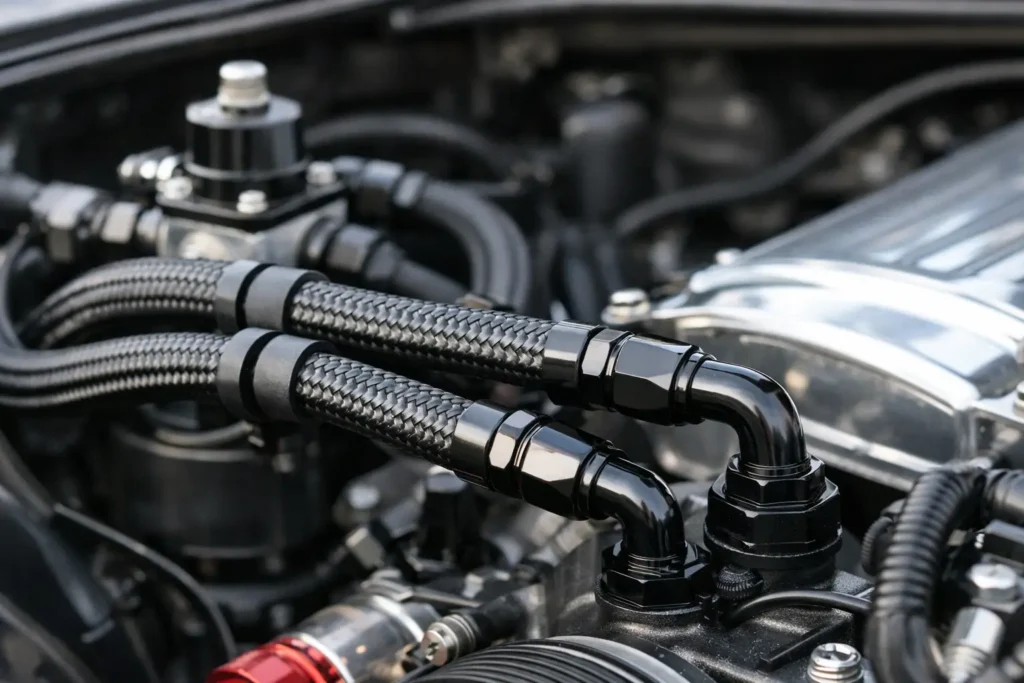
Respect bend radius and fitting angles
Braided fuel hose should not be forced into tight bends to make a route look tidy. Every hose has a minimum bend radius, and exceeding it can restrict flow, stress the liner and load the fitting. If a corner is too tight for a straight hose end, use a 45-degree or 90-degree fitting and let the hardware do the turning.
This is especially relevant near pumps, filters and regulators where several components sit in a small space. Builders often create side-load on a fitting by making the hose pull sideways as it exits. That puts constant stress into the joint and can loosen or fatigue the assembly over time. A slightly longer hose with the correct angle fitting is usually safer than a short hose under tension.
Do not let the hose carry weight
A braided line is not a structural support. Heavy filters, inline sensors and junctions need to be mounted independently, not left hanging from the hose assembly. Once vibration enters the system, the weight of unsupported hardware works against the fitting and thread. On a road car that sees potholes or a race car that sees kerbs, that is asking for trouble.
Route with serviceability in mind
A fuel system needs inspection. Filters need changing, pumps get replaced, and leaks need tracing quickly. If you bury all the hose connections under trim, behind heat shielding or above hard-to-reach crossmembers, servicing becomes slower and mistakes become more likely.
Aim for a route that keeps key joints visible and accessible. That does not mean exposed to damage. It means you can get a spanner on the fitting, check for weeping, and inspect clamp points without dismantling half the car. On competition cars, this matters even more because scrutineering, trackside repairs and regular maintenance all reward a layout that is clean and readable.
There is also a trade-off here. The shortest route is not always the best route if it places unions in awkward or hot areas. Adding a small amount of hose length to move a connection into a cooler, accessible position is often the smarter call.
Choose mounting points carefully
Good routing depends on stable mounting points. Secure hoses to chassis sections, brackets or panels that do not flex excessively and are not exposed to constant impact. Avoid mounting to flimsy trim panels or thin covers that can crack or loosen.
Underbody routing needs extra thought because road debris, standing water and jacking points all come into play. Keep fuel lines above the lowest points of the floor where possible, away from tyre spray, and clear of areas likely to be crushed by careless lifting. On lowered street cars and drift cars, what looks protected on the ramp may still be vulnerable once ride height, lock angle and suspension travel are considered.
If the car sees motorsport use, inspect every routed section with the suspension loaded and steering at full lock. Fuel line clearance near wheel wells, steering arms and moving suspension components is not optional.
Pressure test and recheck after heat cycles
Once the system is assembled, pressure test it before the car goes into service. Check every fitting, every bulkhead pass-through and every transition between hard line and hose. Then recheck after initial heat cycles and again after the first proper drive or event. A fitting that looked dry in the workshop may reveal a minor issue once the system has seen vibration and temperature change.
Do not inspect only for obvious wet leaks. Look for witness marks, polishing on the braid, flattened hose sections, loose clamps and signs that a line is moving more than expected. Routing is proven over time, not at the moment you tighten the last fitting.
For builders sourcing parts for custom fuel systems, this is where quality hardware pays off. Reliable hose, correct fittings, proper clamps and motorsport-minded support parts make safe routing much easier to achieve. ProSpeed Parts supplies the sort of specialised fuel system components serious street, drift and race builds actually need, but even the best parts still depend on disciplined installation.
How to route braided fuel lines safely on real builds
The right route always depends on the car. A boot-mounted swirl pot and twin-pump setup in a drift chassis has different demands from a simple engine bay regulator upgrade on a fast road car. A rear-mounted fuel cell in a race shell often benefits from bulkhead fittings and fixed hard line sections through the cabin or underbody, with short braided sections where flexibility is needed. A compact engine bay with turbo hardware may need more angled fittings and heat shielding than a naturally aspirated layout.
That is the real answer to how to route braided fuel lines safely: plan the route around heat, movement, abrasion and maintenance, then choose hardware that supports that plan. If a route only works because the hose is stretched, forced, wrapped or hidden, it is not finished yet.
The best fuel line installation is the one you barely think about once the car is running hard, because every centimetre of the route has already been thought through properly.