

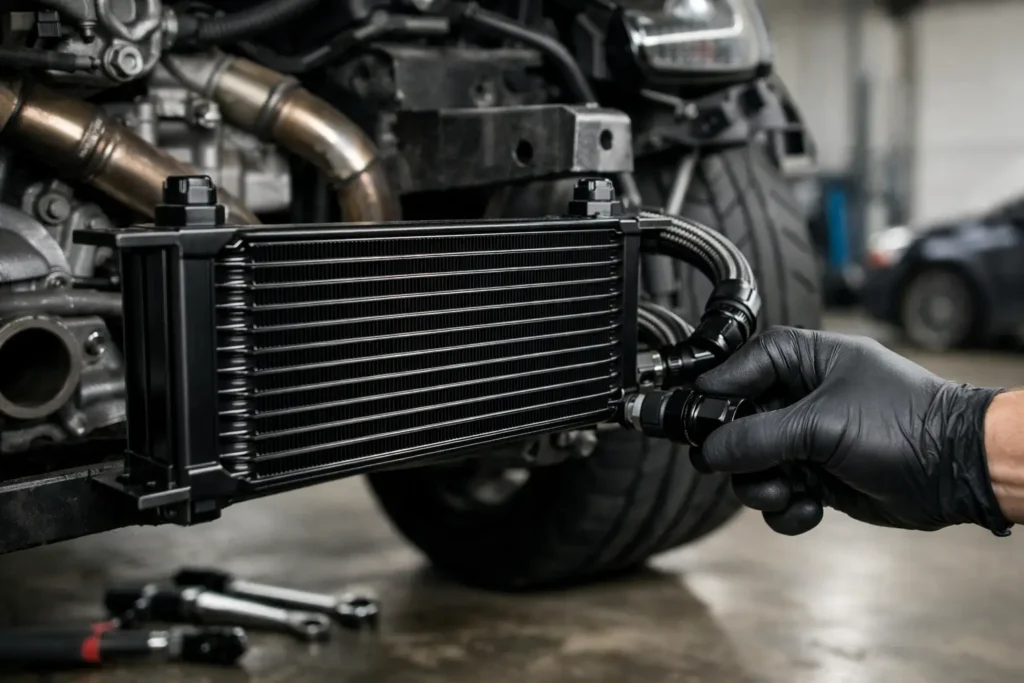
An oil temperature warning after a hard session is not a problem to ignore with a bigger radiator cap or thicker oil. If your engine repeatedly sees excessive oil temperature on track, during drifting, towing or sustained fast road use, an external cooler can protect the lubricant and help maintain stable oil pressure. Knowing how to install oil cooler hardware correctly matters just as much as choosing the core itself: a poor mounting position, undersized hose or air trapped in the system can create problems instead of solving them.
This guide covers the typical sandwich-plate installation used on performance engines with a spin-on oil filter. Remote-filter systems and factory-equipped vehicles follow the same principles, but their adapter and hose layout will differ.
Confirm an oil cooler is the right upgrade
Fit a cooler because the oil is genuinely too hot, not because it looks right behind the grille. Use a reliable temperature sensor and establish what happens during the conditions the car actually sees. A road car that only reaches high temperatures in stationary traffic may have an airflow, radiator or fan-control issue. A track car that climbs well beyond its normal temperature after several laps is a stronger candidate.
The core, thermostat, hose size and mounting location must work as one system. A large cooler without a thermostat can over-cool the oil on the road, particularly in British weather. Oil that never reaches operating temperature carries moisture and fuel contamination for longer, while a cold engine can also show higher pressure. For most dual-use builds, a thermostatic sandwich plate or inline thermostat is the sensible choice.
Check the vehicle’s existing setup before ordering parts. Some engines use a factory water-to-oil heat exchanger, and removing it may affect warm-up behaviour. Others have limited clearance around the oil filter or use an unusual centre-thread size. Confirm the filter thread, sealing diameter, available space, cooler-port thread and the hose specification before committing to components.
Plan the complete oil cooler system
A proper installation needs more than a core and two hoses. You need an adapter or remote filter head, a thermostat where required, correctly sized fittings, compatible hose, mounting brackets, fasteners and abrasion protection. For many modified engines, -10AN hose is a common starting point, but the correct size depends on oil flow, engine output, port size and the system layout. Do not reduce a large adapter outlet to a restrictive small-bore hose simply because the fittings are already on the shelf.
Choose a cooler designed for engine oil pressure and temperature, with a core size suited to the vehicle’s duty. A compact street car with modest power and occasional fast-road use needs a different solution from a turbocharged drift car held at high rpm for a full run. More core area can improve cooling, but only if it receives clean airflow and does not block too much air from the water radiator, intercooler or air-conditioning condenser.
Lay every component out on the bench before fitting it. Decide where the cooler will sit, measure each hose route and identify potential contact points. This is the stage to order the correct 45-degree, 90-degree or swivel hose ends rather than forcing straight fittings to work in a cramped engine bay.
How to install an oil cooler sandwich plate
Start with the engine cold and the car safely supported. Drain the engine oil if a service is due, or place a drain pan beneath the filter area because removing the filter will release oil. Remove the oil filter and clean the filter mounting face thoroughly. The sandwich plate seal must sit against a clean, undamaged surface.
Test-fit the sandwich plate and check its orientation before tightening it. The ports should point towards a route that avoids the exhaust manifold, downpipe, steering shaft, auxiliary belt and suspension movement. On some engines, rotating the plate a few degrees makes the difference between a tidy installation and a hose that rubs through within a few hundred miles.
Use the correct centre bolt or threaded adapter supplied for the engine’s filter thread. Tighten it to the component manufacturer’s specification, then fit the oil filter to the outer face of the plate. Lightly oil the filter seal and tighten the filter as specified by its manufacturer. Do not use excessive force on an aluminium sandwich plate or filter housing.
If the thermostat is built into the sandwich plate, identify the flow direction marked on the unit. With a separate inline thermostat, mount it close enough to the engine to simplify plumbing but away from direct exhaust heat. The aim is to send oil through the cooler once it reaches the thermostat’s opening point, not to create a bypass path that permanently avoids the core.
Mount the cooler where it can actually work
The front of the vehicle is usually the best location because it receives the highest pressure airflow. Common positions include behind the grille, in front of the radiator, or in a dedicated ducted opening. Keep enough clearance from the bumper reinforcement, intercooler pipes and radiator fans to prevent vibration damage.
Mount the cooler securely using brackets attached to strong structure. Avoid relying on plastic core ties through the radiator or condenser for a performance application. They may be acceptable for very light auxiliary coolers, but a heavier oil cooler filled with hot oil needs a more durable solution. Aluminium or steel brackets with rubber isolators help limit fatigue from engine and road vibration.
Air must be able to enter and leave the core. A cooler hidden in a sealed corner of the bumper sees little benefit, while one mounted directly against another heat exchanger can restrict both components. Where packaging allows, leave a small air gap and use simple ducting or shrouding to guide air through the cooler rather than around it.
Keep the ports positioned sensibly for hose routing and bleeding. There is no universal rule that every cooler must have ports at the top, as core design varies, but the installation should not create a high loop in the hoses that traps air. Follow the cooler manufacturer’s recommended orientation where supplied.
Route and assemble the oil hoses
Treat oil lines as safety-critical. A failed fuel line is dangerous; a failed pressurised oil line can empty an engine in seconds and put oil beneath the tyres. Route the feed and return hoses away from heat, sharp edges and moving parts. If a line must pass near the exhaust, use proper heat shielding and maintain as much clearance as possible.
Support long hose runs with insulated P-clips at sensible intervals. The hose should not hang from the fittings, touch the subframe, or tighten at full steering lock and suspension compression. Check the route with the car on the ground as well as in the air. What clears on axle stands can contact a tyre or anti-roll bar at ride height.
Cut hose squarely with the correct tool and clean out every fragment before assembly. With reusable AN fittings, ensure the hose is fully seated in the socket before tightening the fitting body. Lubricate threads only where the fitting manufacturer permits it. AN flare faces seal metal-to-metal, so do not wrap PTFE tape around the flare threads. Use thread sealant only on tapered pipe threads where specified, keeping it away from the oil passage.
Mark both lines before final fitment if their routing is similar. Crossing feed and return ports is not always harmful on a simple cooler circuit, but it can be wrong on thermostatic assemblies or systems with a defined flow path. Follow the markings on the sandwich plate, thermostat and cooler.
For custom builds, PRO-S fittings and hose components allow the system to be built around the available space rather than compromised by generic rubber hose and worm-drive clips. Match all thread types carefully. AN, BSP and NPT are not interchangeable even when they appear close in size.
Refill, prime and inspect before driving
The cooler, hoses and thermostat add capacity, so refill the engine with the correct oil and expect to add more after the first circulation. Do not assume the original factory fill quantity remains accurate. Check the dipstick or electronic level only according to the vehicle manufacturer’s procedure.
Before allowing the engine to fire, disable ignition and fuel where practical, then crank the engine in short intervals to build oil pressure. Reconnect the systems, start the engine and let it idle while inspecting every fitting, the sandwich plate seal and the oil filter. A clean paper towel around each joint makes a minor seep easier to spot than looking at oily fittings by eye.
Watch oil pressure closely. If pressure does not rise promptly, switch off immediately and investigate. Check oil level, thermostat orientation, adapter fitment and whether a hose has kinked during tightening. Never run the engine in the hope that a dry system will eventually prime itself.
Once warm, recheck the level and inspect again after a short road test. Then examine the lines after the first hard heat cycle and after the first track day. Hose clamps, brackets and fittings can settle, particularly on a newly fabricated installation.
A well-installed oil cooler should be almost unremarkable: stable temperatures, consistent pressure and no oil where it does not belong. Build the system around measured temperatures, proper airflow and quality hose routing, and it will support the engine when the driving gets serious.