

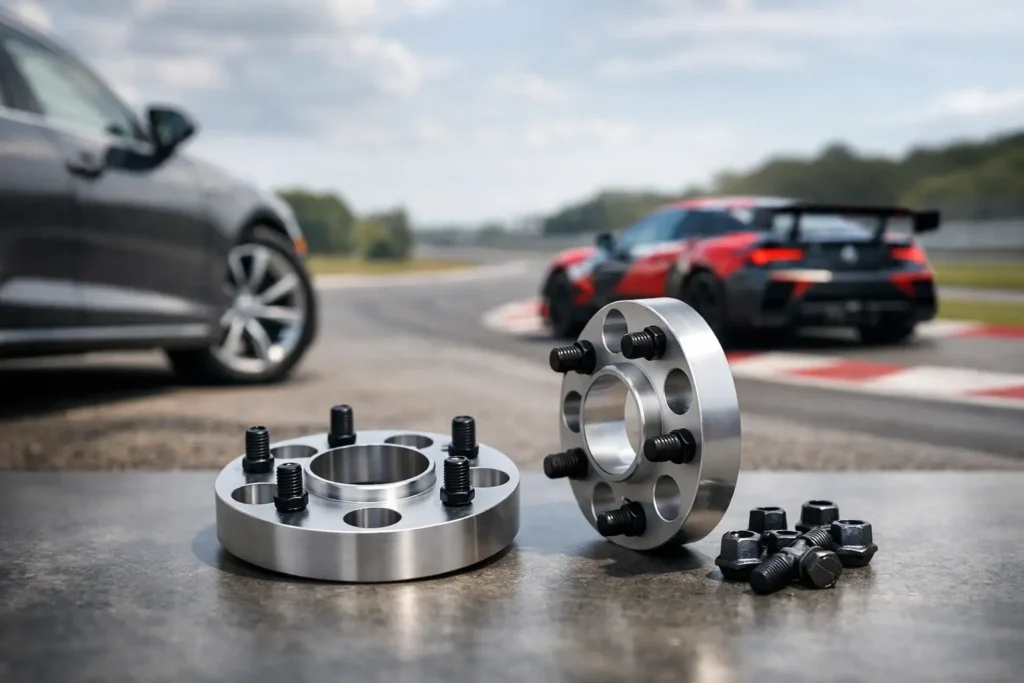
A 5 mm spacer can solve the clearance issue between a wider wheel and a brake caliper. A 25 mm spacer can deliver the stance and track width your build needs. Neither is automatically unsafe. The trouble starts when a spacer is treated as a cosmetic universal part rather than a load-bearing wheel-mounting component.
Are wheel spacers safe? Yes, when they are correctly specified for the vehicle, properly manufactured, installed with the right hardware and checked as part of normal maintenance. No, when fitment, stud engagement, hub location or wheel clearance is guessed. On a fast road car, drift car or circuit build, those details decide whether the spacer works as intended or becomes the weakest point in the assembly.
Are wheel spacers safe when fitted correctly?
A wheel spacer sits between the hub mounting face and the wheel. It moves the wheel outward, reducing positive offset and increasing track width. That can create clearance for larger brakes, coilovers or suspension arms, and it can bring an aggressive wheel fitment back under the arch.
The spacer itself is not carrying the entire vehicle weight through the wheel bolts or studs. On a properly hub-centric setup, the hub spigot and matching centre bore locate the wheel concentrically, while the clamping force from the bolts or nuts holds the assembly together. The wheel fasteners are designed to clamp the wheel, spacer and hub faces as one rigid stack.
Problems arise when that stack is not centred, not fully clamped or not supported by enough thread engagement. Vibration, loosening fasteners, damaged mounting faces and cracked hardware are not inevitable consequences of spacers. They are consequences of poor specification or poor installation.
For performance use, think of spacers in the same category as brake hardware or suspension fasteners: small components with a direct effect on safety. Buy to specification, not just thickness and price.
Hub-centric fitment is the first requirement
The most important distinction is between hub-centric and generic flat spacers. A hub-centric spacer is machined with a vehicle-specific centre bore on the back and a matching spigot on the front. It locates on the hub and recreates the original wheel-centring surface for the wheel.
This matters because an off-centre wheel can cause steering vibration, uneven loading and poor confidence at speed. The symptom often appears around motorway speeds, but the underlying issue is not always wheel balance. A wheel that is not accurately located on the hub can feel exactly like a balancing problem.
Thin spacers can be an exception. Depending on the vehicle’s original hub spigot length and the wheel’s centre-bore design, a small slip-on spacer may still leave enough hub lip to centre the wheel. This must be measured, not assumed. If the spacer leaves the wheel relying only on bolts or studs for location, move to a hub-centric design or revise the fitment.
The centre bore must match the vehicle hub accurately, and the spacer’s outer spigot must match the wheel centre bore. Do not force a tight spacer over a corroded hub, and do not use tape, improvised sleeves or loose rings to make an incorrect bore work. Clean, precise contact surfaces are part of the fitment.
Choose the spacer design for its thickness
Spacer thickness changes the hardware requirement. There are two main arrangements.
A slip-on spacer slides over the existing hub and uses longer wheel bolts or extended wheel studs. It is generally used where the factory studs or bolts are no longer long enough once the spacer is added. The exact limit is set by usable thread engagement, not by a rule of thumb copied from another platform.
A bolt-on spacer is usually thicker. It bolts to the hub using its own supplied hardware, then the wheel bolts or nuts to the spacer’s new studs or threaded holes. This design can be the correct solution for larger spacing changes, provided the spacer is vehicle-specific and the supplied fasteners are the right seat type, pitch and grade.
Do not mix up wheel-bolt seat profiles. Common designs include taper/conical seats, ball/radius seats and flat seats. The wheel dictates the seat shape, not the spacer. A bolt that appears to tighten can still clamp badly if its seat does not match the wheel.
Thread engagement and fastener quality are non-negotiable
On stud-and-nut vehicles, the nut must engage enough full threads on the stud. On wheel-bolt vehicles, the bolt must extend far enough into the hub threads without bottoming out. There is no safe universal measurement because thread pitch, stud diameter, hub depth and wheel design vary by application.
The practical rule is straightforward: use hardware engineered for the exact vehicle and spacer thickness, then confirm engagement during fitting. If you have changed from OEM wheels to aftermarket wheels, check the seat type and bolt length again. The wheel may require different hardware even before a spacer is added.
Avoid unknown wheel hardware, damaged threads and decorative lightweight nuts on a car that sees hard road, drift or track use. Motorsport does not mean accepting poor hardware. It means paying closer attention to material, engagement and inspection intervals.
If extended studs are required, have them fitted correctly. Press-in studs must seat fully in the hub flange, and the stud length must allow the wheel nut to engage properly without creating interference behind the wheel. A workshop should also inspect the hub flange for cracks, distorted holes or damaged threads before building the assembly back up.
Clearance matters more than stance
Moving a wheel outward changes more than its relationship with the arch. It also changes clearance at full steering lock and full suspension compression. A wheel that clears on a ramp can still contact the arch liner, bumper tab or wing edge when the suspension loads up through a compression, kerb strike or drift transition.
Check the car with the steering at full lock in both directions. Check inner clearance to coilover springs, brake lines, anti-roll-bar links and calipers. Then check outer tyre clearance with the suspension compressed as realistically as possible. Remember that tyre sidewalls flex, and a lower, wider tyre does not always provide more clearance.
Wheel poke is not only an aesthetic question. Tyres extending beyond the bodywork can create spray, debris and compliance issues for a road car. In the UK, the wheel and tyre must be secure and must not foul the bodywork or suspension through the steering and suspension travel. MOT inspection may identify an insecure wheel, excessive bearing play or obvious tyre contact, but an MOT pass is not proof that a modification is optimised for high-speed use.
Tell your insurer about the modification. Spacers can be viewed as a wheel or suspension-related change, and undeclared modifications can create problems when you need cover most.
The real trade-off: geometry and bearing load
Wheel spacers increase track width, which can improve clearance and may give a car a more planted response. But moving the wheel centreline outward also increases leverage on the wheel bearing, hub and suspension joints. The wider the spacer, the greater the change.
That does not mean every spacer will immediately ruin wheel bearings. It means bearing load, scrub radius and steering behaviour must be considered alongside wheel width, tyre size, vehicle weight and intended use. A modest spacer on a lightweight track hatch is a different proposition from a large spacer on a heavy, high-grip road car running wide semi-slicks.
Geometry changes can also affect steering kickback and tramlining. On a drift build, a revised scrub radius may be part of the intended steering setup. On a fast road car, it may make the car less settled on rough surfaces. Use spacers to solve a defined clearance or fitment requirement, not as a substitute for choosing the correct wheel offset.
Installation: where safe spacers are won or lost
Before fitting, remove rust, paint flakes, dirt and old anti-seize buildup from the hub face and wheel mounting face. The spacer must sit flush. Even a small amount of debris can prevent full contact and allow the assembly to settle after installation, reducing clamp load.
Fit the spacer dry and square, unless the vehicle or hardware manufacturer specifies otherwise. Apply the correct wheel bolt or nut torque using a calibrated torque wrench, following the vehicle manufacturer’s specification or the spacer supplier’s instruction where applicable. Do not use an impact gun as the final torque method.
After the first 30 to 60 miles, recheck torque. Do the same after a hard track day, a drift event, or any wheel-off work. Inspect periodically for witness marks around the mounting faces, fretting corrosion, damaged threads, loose studs or cracking. If a steering vibration develops, do not keep driving and assume it is harmless. Stop, inspect fitment and balance, then correct the cause.
When to avoid wheel spacers
Do not fit spacers to compensate for a damaged hub, warped wheel, stripped thread or poor-quality wheel. They will not fix the underlying issue. Avoid them where the wheel already has marginal arch clearance, where correct hardware is unavailable, or where the spacer cannot be properly hub-centred.
Be cautious with exceptionally thick spacers on heavy vehicles, high-powered cars or builds used regularly on rough roads. A bolt-on system from a reputable manufacturer may still be suitable, but it deserves a more considered assessment of bearing loads, wheel offset and intended mileage.
For any car used competitively, check the regulations for the championship and class. Some series restrict track width changes, wheel spacing or the use of bolt-on adaptors. A technically sound setup can still be non-compliant.
The right spacer is the one that gives your wheel and brake package the clearance it needs while preserving accurate hub location, correct fastener engagement and full tyre travel. Measure the hub, wheel and available clearances first. Then choose proven, vehicle-specific hardware from a performance supplier such as ProSpeed Parts, fit it properly, and inspect it like the critical component it is.