

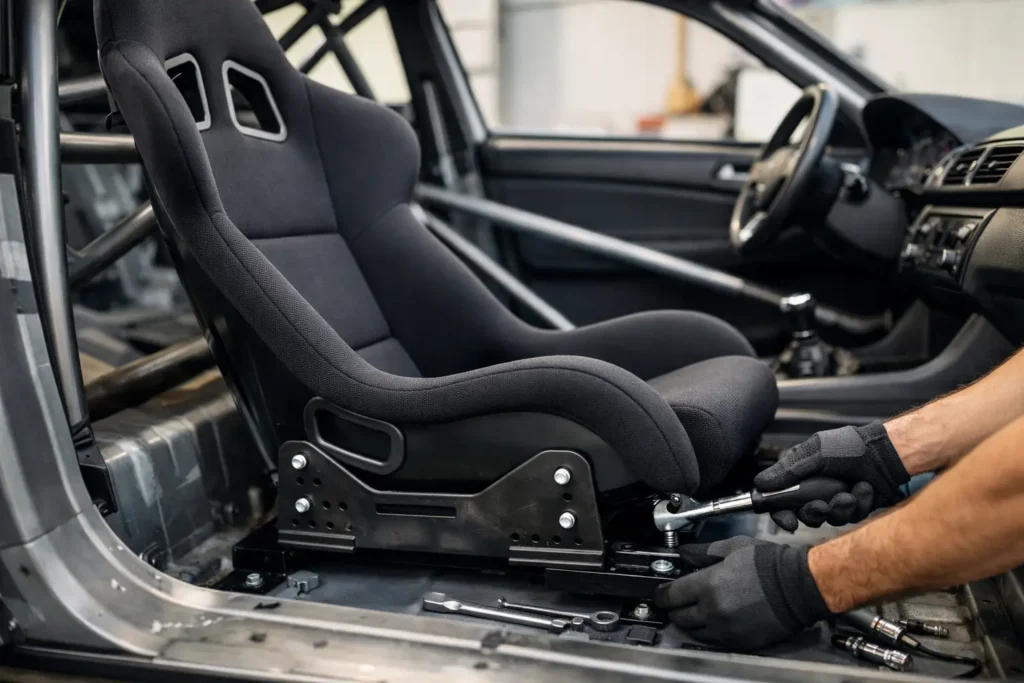
A racing seat that sits too high, flexes under braking or puts the steering wheel out of reach can make a fast car harder to drive. Learning how to mount a racing bucket seat properly is not just a cosmetic upgrade job. It affects driver control, harness geometry, visibility, safety-system function and whether the car will meet the rules for its intended track or competition use.
A proper installation starts with compatible hardware, not a drill and a handful of generic bolts. Treat the seat, brackets, runners, base mounts, harnesses and vehicle floor as one system. If any part is wrong, the rest of the build cannot compensate for it.
Start with the right seat and mounting system
First, establish whether the seat is bottom-mounted or side-mounted. Most serious fixed-back bucket seats use side mounts, with threaded inserts on each side of the shell. This layout gives more adjustment range for height, rake and fore-aft position, and it is generally the preferred solution for drift, track and race builds.
Bottom-mounted seats attach through their base and can suit road-focused installs where the original seating position is being retained. They are not automatically less safe, but their adjustment range is more limited and the seat base must match the mounting pattern exactly.
Choose brackets designed for your exact seat and vehicle wherever possible. A vehicle-specific base frame or subframe normally picks up the factory mounting points in the floor, avoiding unnecessary drilling and keeping the installation reversible. Universal frames can work in custom builds, but expect measuring, fabrication and careful checking for clearance around the centre tunnel, transmission tunnel, door card and roll cage.
Runners are useful on a street car shared by more than one driver. They add height, however, and can introduce a small amount of movement compared with a direct-mounted fixed seat. For a dedicated competition car, a fixed side-mount installation is often lower, lighter and more rigid. Check your championship regulations before deciding, as some classes specify acceptable mounting methods and materials.
How to mount a racing bucket seat step by step
Before removing the original seat, measure it. Record the height from floor to cushion, the distance from the seat back to steering wheel, and the pedal reach. These reference points help prevent the common mistake of fitting an expensive bucket seat, then discovering that your helmet touches the headlining or your knees sit too close to the wheel.
Disconnect the battery before unplugging any factory seat wiring. Modern road cars may have side airbags, occupancy sensors, seatbelt pretensioner wiring or electric adjustment motors. Removing an original seat can trigger warning lights, and deleting safety equipment may affect road legality, insurance or MOT requirements. Handle that side of the conversion correctly rather than treating it as an afterthought.
Fit the vehicle-specific base frame to the factory floor mounting points first, but leave its fasteners slightly loose. Install the side brackets on the seat shell using the bolts supplied or specified by the seat manufacturer. Do not substitute random hardware because it happens to fit. Use high-quality, correctly graded fasteners of the specified diameter and length, with the required washers and locking method.
Place the seat and side-bracket assembly onto the base frame. Set the seat approximately central to the steering wheel, then check the initial height and angle before tightening anything. A seat can look straight relative to the dashboard while still leaving the driver offset from the wheel. The steering wheel centreline is the reference that matters.
With the seat held in position, sit in it wearing the footwear you drive in. Fully depress the clutch, where fitted, and brake pedal. Your knee should retain a slight bend at full pedal travel rather than locking straight. With your shoulders against the seat back, you should be able to rest your wrists over the top of the steering wheel rim. This gives you working arm bend when holding the wheel at nine and three.
Adjust height and rake in small changes. Lower is usually better for helmet clearance and centre of gravity, but not if the dashboard blocks your view or your legs foul the steering wheel. Excessive rearward rake may feel relaxed on the road, yet it can reduce control and alter harness fit under heavy braking. Aim for a supported, upright driving position with clear pedal control and no pressure point behind the knees.
Once the position is correct, centre the seat, check that it clears the doors and cage, then tighten all mounting hardware to the torque figures specified by the seat, bracket and vehicle manufacturers. There is no universal torque figure that is safe for every bolt size and mount design. Mark tightened fasteners with a paint pen so inspections are faster later.
Mounting points, bolts and floor reinforcement
Never bolt a racing bucket seat through thin floorpan metal without a properly engineered reinforcement solution. The original mounting points are designed to carry seat loads, which is why a model-specific subframe is usually the cleanest route for a road or track-day car.
A custom installation needs more than a thick plate under the floor. Load paths, plate size, material thickness, bolt spacing, corrosion protection and clearance below the car all matter. Fuel lines, brake lines, wiring looms and exhaust heat shields can run close to the seating area. A bolt protruding beneath the floor may also interfere with underbody protection or be exposed to road damage.
For race-car fabrication, use the rulebook for the series and consult an experienced cage or motorsport fabricator. Regulations can specify steel grades, minimum dimensions, counterplates and approved attachment methods. FIA approval on a seat does not automatically make every way of mounting that seat compliant.
Avoid stacking washers to correct a poor fit, drilling bracket holes larger to gain adjustment, or forcing brackets into alignment with bolts. Those shortcuts create stress and reduce the clamping security of the assembly. If the components do not line up naturally, stop and identify the incompatible part.
Seat belts and harness geometry need separate planning
A bucket seat installation is often paired with harnesses, but the harness should not be improvised around the new seat. The harness opening positions must suit the driver and seat. Shoulder straps should leave the seat at the correct height and run back to an approved harness bar, roll cage crossbar or manufacturer-approved rear anchorage arrangement.
Do not wrap shoulder straps around a rear strut brace, bolt them to unsuitable thin metal or assume the rear seatbelt mounts are suitable without checking the harness and vehicle guidance. The angle of the shoulder straps is critical. If they run sharply downward from the shoulders, spinal compression can become a serious concern in an impact.
Lap belts should pull down and rearward across the pelvis, not over the stomach. Anti-submarine straps need an appropriate mounting point below the seat and must sit correctly through the seat openings. Use the belt manufacturer’s instructions and applicable motorsport rules as the authority here.
Factory three-point belts require equal care. Check that the buckle and stalk sit naturally, the belt can latch cleanly, and the shoulder belt does not rub against the seat shell. Do not share a mounting bolt between seat, harness and belt components unless the specific hardware design and manufacturer instructions expressly allow it.
Final checks before the first drive
Before driving, slide the seat through its full travel if runners are fitted and make sure it locks positively in every position. Check that the door closes without contacting the seat or brackets, that all pedals can reach full travel, and that the steering wheel, handbrake, shifter and switches remain accessible.
For track use, inspect the seat installation after the first heat cycle and again after the first event. Look for paint-mark movement at bolts, loose runner mechanisms, cracked brackets, torn carpet around mounting points or contact marks on the shell. A fixed-back seat should feel planted under hard braking and kerb strikes, with no rocking or clicking.
A correctly mounted bucket seat makes the car feel more precise before any extra power, tyre or suspension upgrade. Take the time to set it around the driver, use purpose-built hardware, and inspect it like the safety-critical component it is.